It’s time to bust out your craft materials and get creative! We’ve got two more fabulous activities for you to try, so grab a cup of tea and read on.
Make your own hoard container
We created this activity especially for our friends at the Young Archaeologists Club. It’s a fun and slightly messy activity to create your very own hoard container to keep your treasures in.

The full instructions are available on the Young Archaeologists Club website here. Whilst you’re over there, why not check out some of their other fabulous activities and resources?
Make your own artefact picture puzzle
Archaeology is all about piecing together the past so why not challenge yourself to do the same with our artefact picture puzzle?
You will need:
- some pieces of cardboard
- poster paint
- glue
- scissors (or an adult with a craft knife)
- a picture of an artefact
Step 1: Take a piece of cardboard and cut out two squares of the same size. We have used an 8 inch square here.
Step 2: Take one of theses squares and cut out a smaller square. Put the smaller square safely to one side for later.

Steps 3-5: Put down some newspaper to protect your table. Then get your poster paint and paint the largest card square and the square with the cut-out. Leave to dry. These two pieces will form the frame of your puzzle.

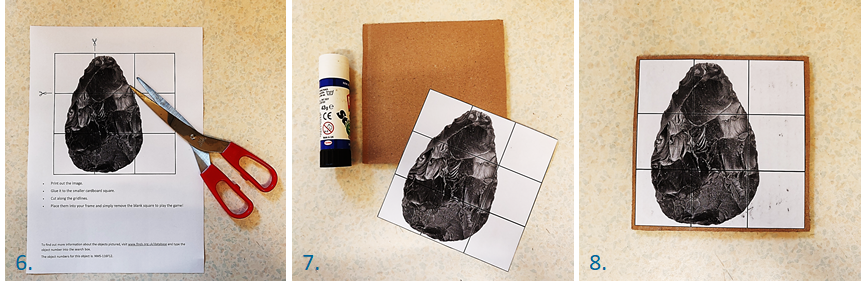
Step 6: Print out a picture of your favourite object from the PAS database. You can use one of our templates at the bottom of this article, or you can choose your own object from the database. Whatever you choose make sure that it is the same size as your smallest cardboard square. Also make sure that one of your corners is completely blank. You can see that we have left the top right corner blank – all will become clear later!
Steps 7-8: Cut out your image and glue it to the smallest cardboard square. Leave to dry.

Steps 9-10: Once the paint on your frame pieces has dried, glue the cut-out square to the large square as shown below to create your finished frame. Leave to dry.

Steps 11-12: Take some scissors, or get an adult with a craft knife, and cut your artefact image into 9 equal squares. Our templates have handy gridlines printed on them to help you with this!

Step 13: Place your pieces into your frame in the correct order. You may need to trim them slightly to ensure they fit and are able to slide around.
Step 14: To play the puzzle, remove the blank square and jumble all the other squares up.
Step 15: Solve the puzzle! Slide the pieces around until they are in the correct order again.

Download our templates here:


